


AquaVista Aquatics
Sutherland Sandfall Kit
Sutherland Sandfall Kit
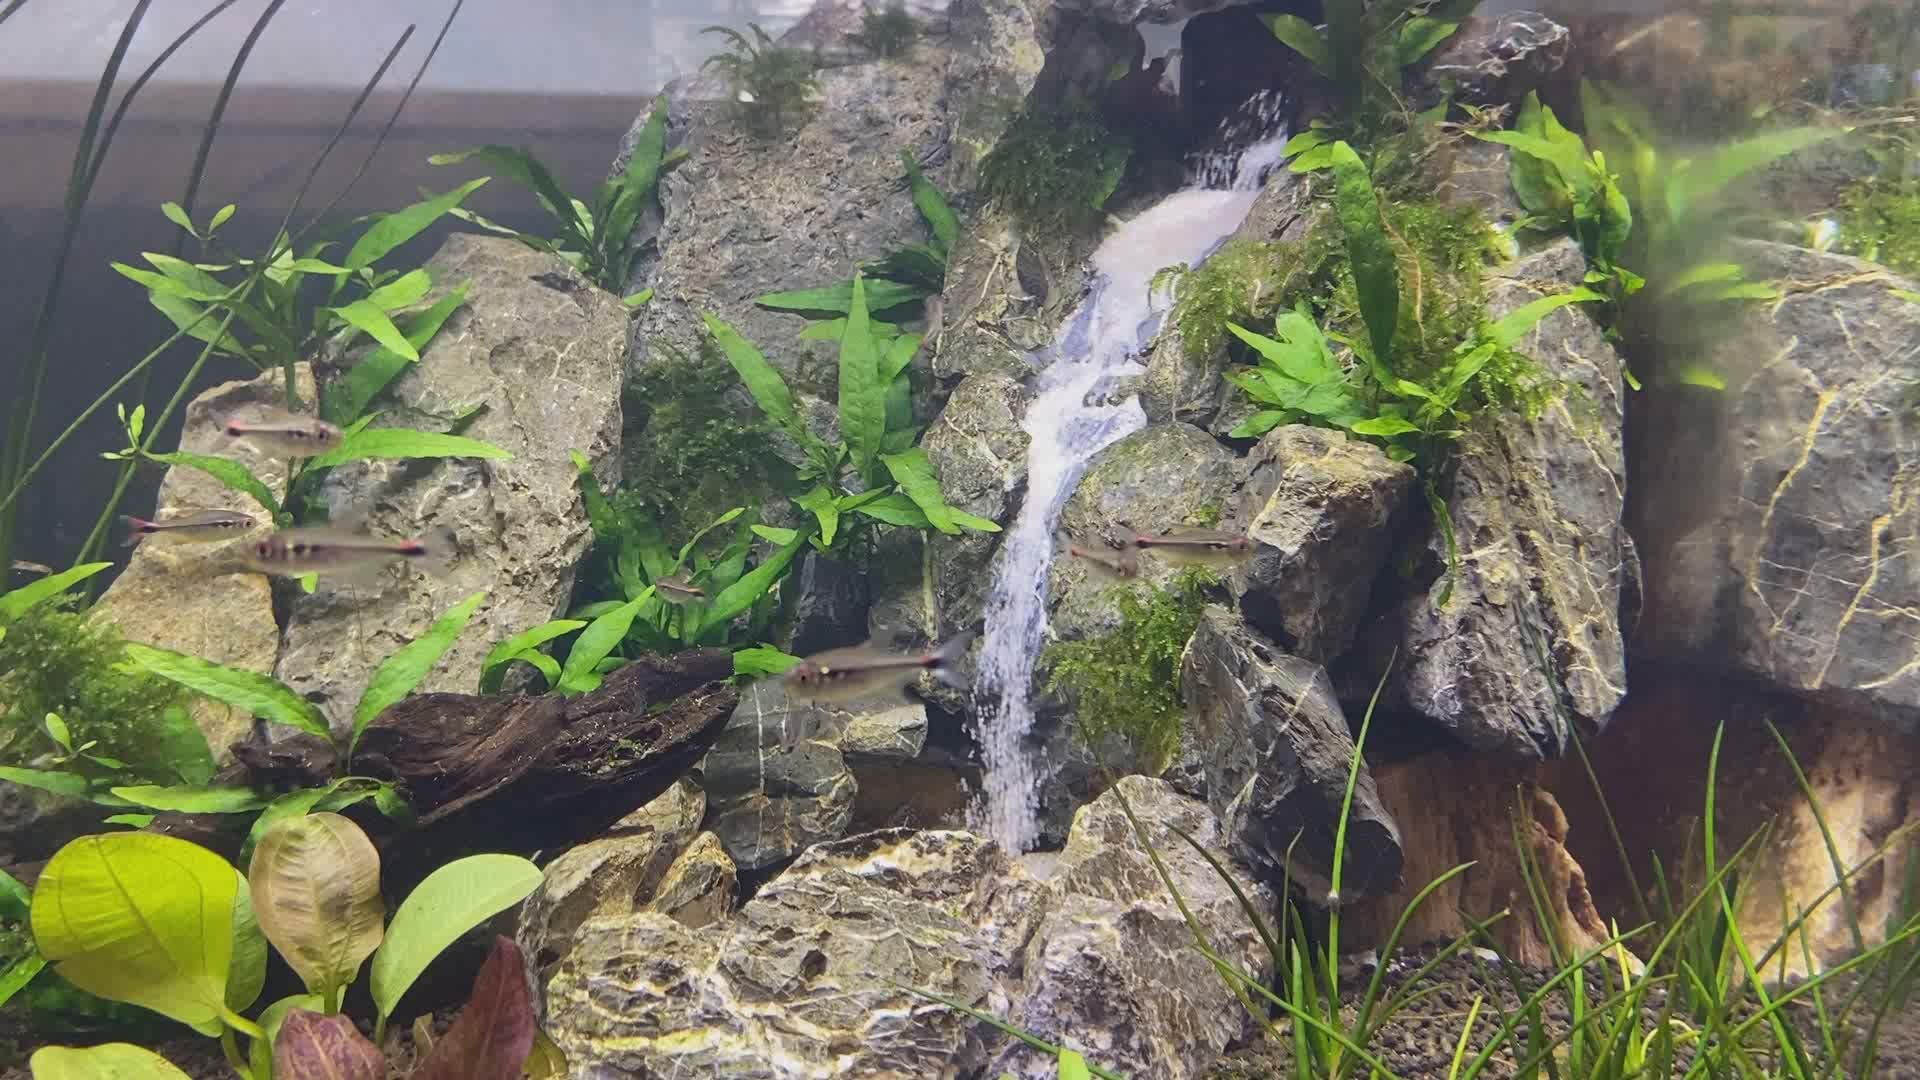
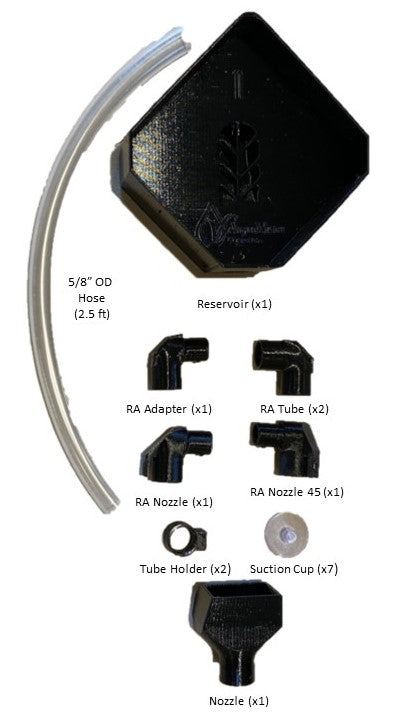
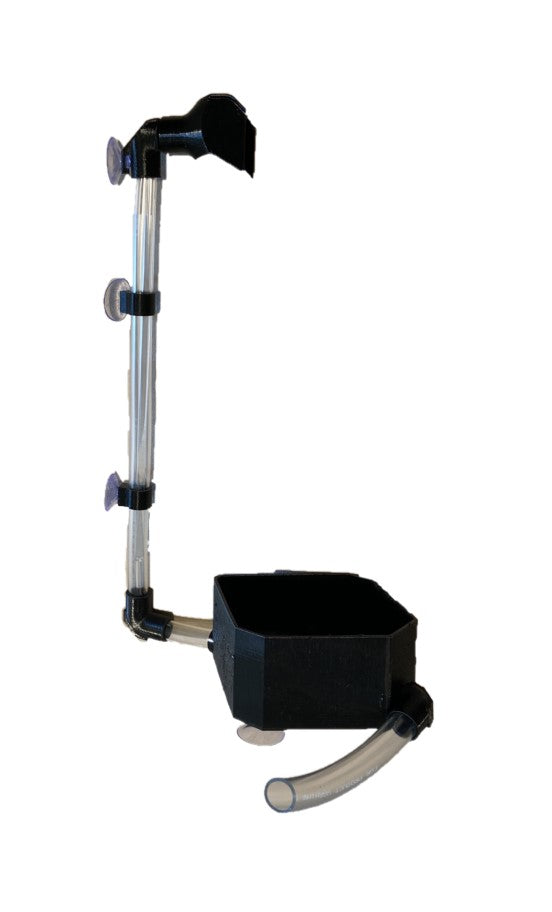
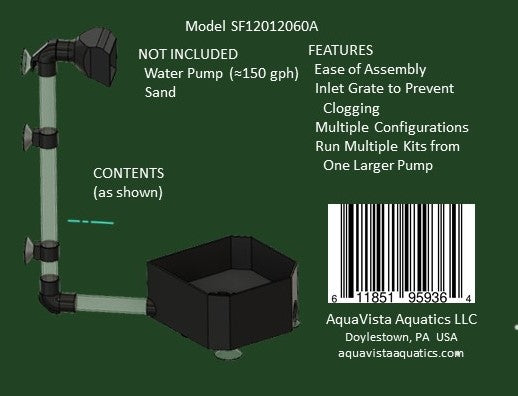
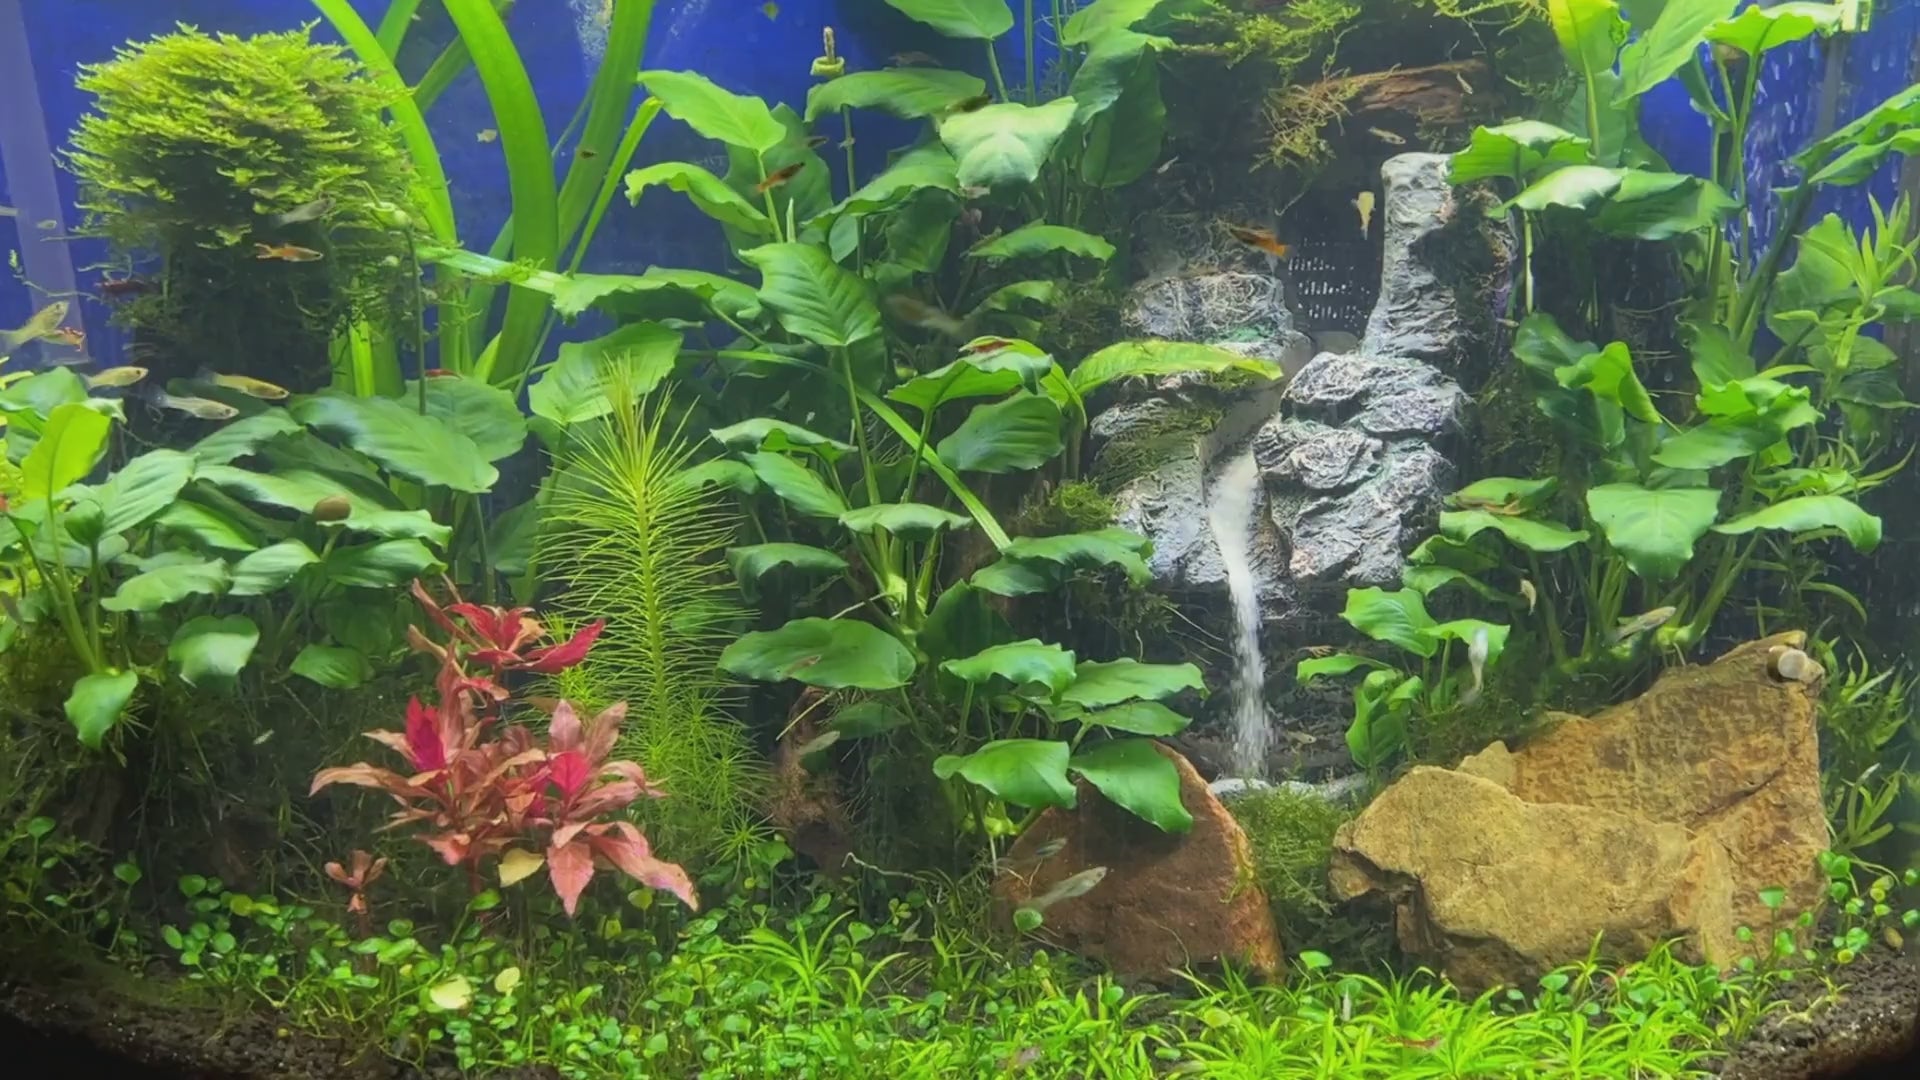
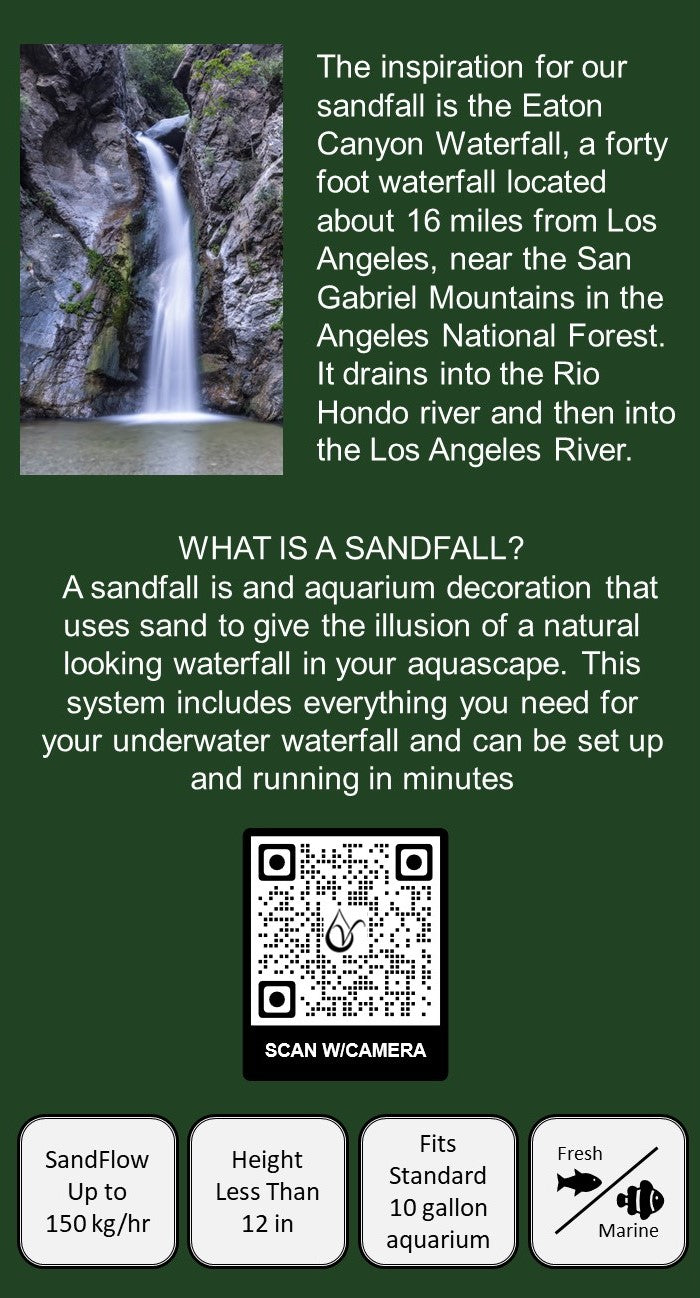
The Scapable Sandfall is an underwater waterfall for an aquarium that uses sand to give the illusion of a natural looking waterfall in your aquascape. The kit includes all the plumping for the Sandfall and is designed to allow you to use natural rock, wood, and plants to give your aquarium the most natural looking Sandfall possible. Simply assemble the SandFall kit as you incorporate it into you aquascape, then attach your pump and add the sand provided with your kit and you have a beautiful addition to your underwater nature aquarium.
- Suitable for Waterfalls of 6 to 20 inches high
- Aquariums of 10 gallons or more
- Large Sand Reservoir, approximately 5 x 5 inch
- Reservoir inlet grate to help prevent clogs
- Input Pump Connection for 1/2" ID hose
- Input Pump Required, approximately 150 gph
- Recommended Pumps HERE
Use Buy with Prime for Free Shipping and Faster Delivery!
Not a Prime Member. Click here to buy on Amazon with Free Delivery
Couldn't load pickup availability
Share


Assembly Instructions
Assembly Instructions
We also offer step by step written instructions. Just click below.
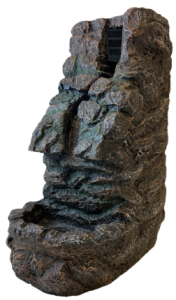
Looking for a Plug and PLay Sandfall
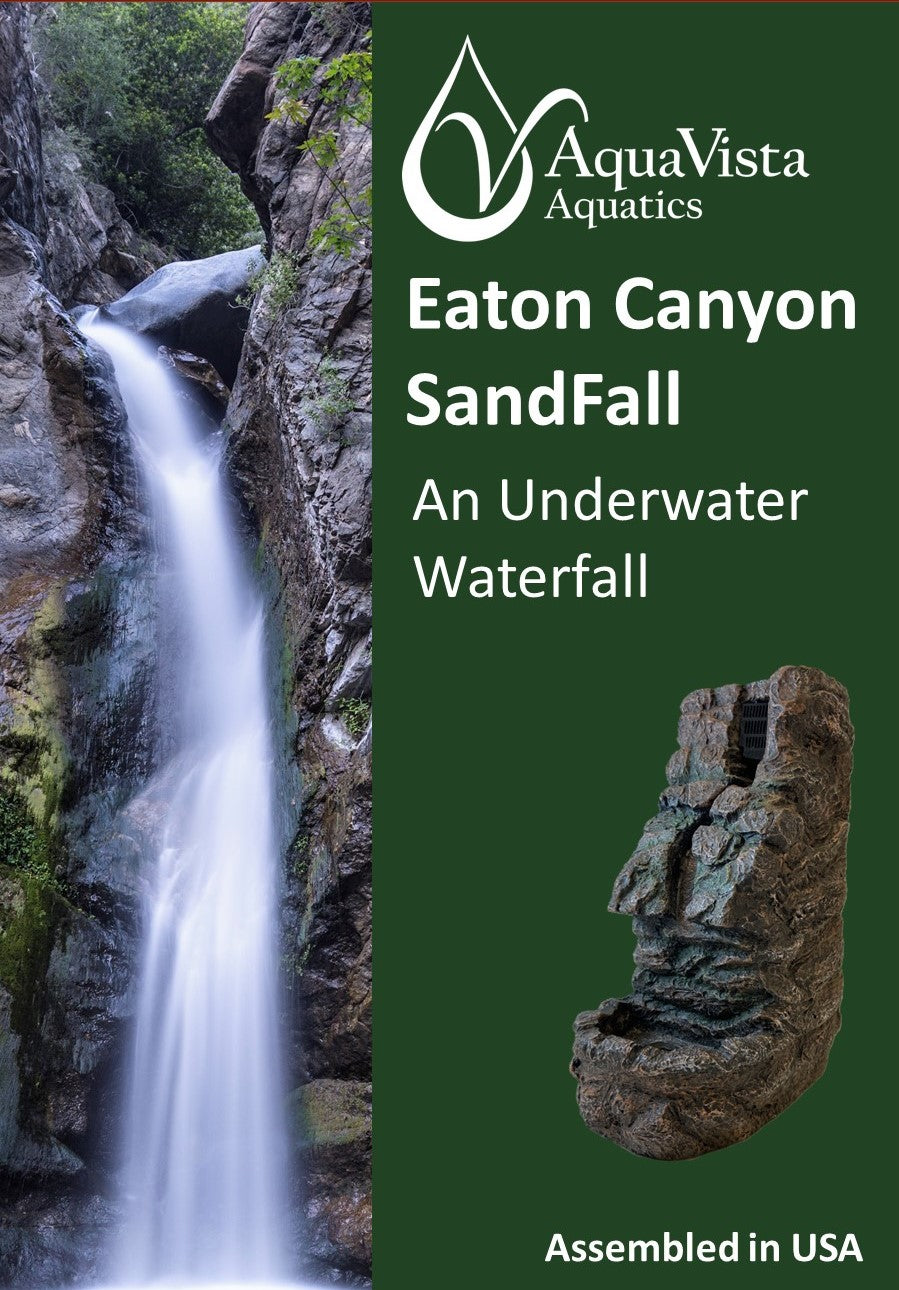
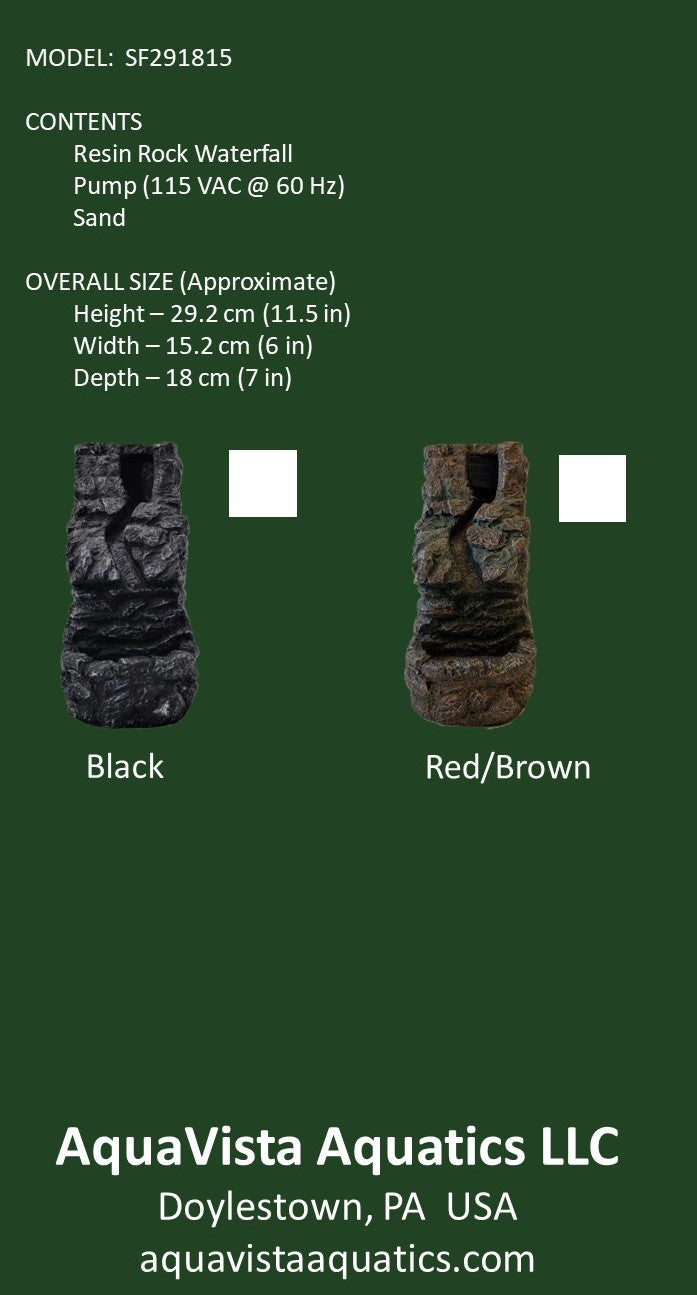
The Eaton Canyon Sandfall s a fully assembled sandfall that you can simply place into your aquarium, plug in, and add the included sand.
AquaVista Aquatics
Eaton Canyon Sandfall
Share


FAQs/Troubleshooting
How do Sand Waterfalls work?
They use falling sand to give the illusion of an underwater waterfall.
There are several different methods to create a SandFall. Our SandFalls use the suction created by running water to draw the sand into the main water line which is then expelled out a nozzle to create the waterfall effect. We have found the water pump systems to provide a more realistic looking sandfall and a more robust system than the air pump driven sandfalls
The sand then exits the nozzle and falls into the sand reservoir where it is then drawn into the waterline again.
There is less sand flowing thru the SandFall
1. Check for stones, snails, or other obstructions in the Reservoir
2. It is normal for some sand to lay on the reservoir or even fall outside of the reservoir when you begin running it. This is generally sand that is too small and light and will stop after a day or two. Your system should run for months from that point on. If there is not enough sand left int eh reservoir after this process then you may need to add a bit more sand to the reservoir. If you continue to lose sand frequently, check that your system is level or leaning slightly backwards. If the problem persists, please contact us at info@aquavistaaquatics.com
3. Clean the pump. As the pump gets dirty it pushes less and less water, eventually is not strong enough to operate the sandfall and it will stop. This usually take several months See the installation instructions for cleaning the pump.
4. There may be sand, substrate, or other debris that is causing an obstruction inside the system. This is not common due to the grate over the bottom of the reservoir which prevents objects from entering the system that are large enough to obstruct it. If you believe this is the cause of your problem please contact us for support at info@aquavistaaquatics.com.
There is No Sand flowing thru the SandFall
1. Check for stones, snails, or other obstructions in the Reservoir.
2. Stir the sand in the reservoir. This can sometimes create flow and if that starts it running again then it indicates there is not enough sand. If too much sand has been lost outside the reservoir you may need to add sand to the reservoir.
3. Verify the pump has power
4. If you recently placed the sandfall in the tank, you should turn it upside down to make sure all of the trapped air in the sandfall is released. This can prevent the sandfall from starting.
5. If the sand fall was working and has now stopped and there may be some sand circulating in the reservoir, the most likely issue is that the pump needs to be cleaned. When the pump gets dirty, it pushes less water, which eventually gets to the point where there is not enough flow for the sandfall to work properly. See the installation instructions for cleaning the pump.
6. See if there is sand filling the tubes that run to the nozzle at the top of the sandfall. Sometimes when the sandfall is turned off sand will fall back into the tube and then the pump may not have enough power to push the sand out. In this case, your pump probably needs cleaned, but you should also clear out the tube.
7. Verify there is not too much sand. Sometimes you can over fill the sand reservoir and the sand sticks enough to itself that the system cannot get started. This is uncommon, but If you think this might be the cause, try removing some sand and stirring what is left to start the fall.
8. There may be sand, substrate, or other debris that is causing an obstruction inside the system. This is not common due to the grate over the bottom of the reservoir which prevents objects from entering the system that are large enough to obstruct it. If you believe this is the cause of your problem please contact us for support at info@aquavistaaquatics.com.
My Water is Cloudy, What do I do?
Your filter should clear this up in 24 hrs or so. If it is not clear by then, clean your filter media and you can speed up the process with a water clarifier. We recommend Seachem® Clarity for this purpose. If the problem persists, contact us and we can help.
What Type of Sand do you Recommend?
Our testing has been done with the Imaginarium® Brand White Sand from PetCo, which comes in 5lb and 20lb bags We believe this sand has a suitably consistent grain size and due to the pure white color gives the most realistic look. However, other sands with a grain size of approximately 1 mm should work fine in our sandfalls. If the grain size is too small, the sand will not fall properly and if it is too large it may damage your sandfall.
Why use an AquaVista Aquatics SandFall instead of a DIY model?
Short Answer
- IT WORKS
- A DIY version can take 40 hrs or more to set up and get working properly.
- IT CONTINUES TO WORK
Long Answer
First and foremost, IT WORKs. Our system has been heavily tested and works under a wide range of conditions. We offer detailed instructions and an extensive troubleshooting guide on our website. There are lots of videos and internet instructions on how to make DIY kits. What they don’t show you is how many times you will need to test and adjust your plumbing and your scape to get it to work. When you do get it to work, they frequently have a relatively poor rate of sand flow that is less than completely impressive. Once you finally have it working and then fill your tank for the final time and add fish, the DIY sandfalls will frequently clog or work even more poorly over time. And then what, rip your completed tank apart to start over.
This system also includes a reservoir for the sand facilitating its complete return into the sandfall. This reservoir contains a grate to prevent items that can clog the system from entering the plumping.
While we cannot guarantee you will never have a problem, we have tested 100's of configurations and many scapes with months of continuous operation. This has allowed us to design and build a very robust system for a great looking SandFall that will work for years. If and when you do encounter problems, our website has a great deal of trouble shooting information to get you back and running as fast and as easily as possible and we are readily available to help you by email and phone with support from the USA..
In our experience, creating a DIY SandFall takes a lot of time and effort. About half this time is getting the DIY SandFall to work properly and the other half is getting your aquascape to return the sand to the reservoir area and creating the look you want. Using the AquaVista SandFall allows you to eliminate the trial and error process of the DIY version. This allow you to spend your time on what you enjoy most, creating a spectacular aquascape that will look great and work for months and months to come.
Are the materials in the SandFall safe for my aquarium?
Yes. The plastic parts in your sandfall are made from PETG. This is similar to the material, PET, which is what common disposable water bottles are made from. PETG is considered safe by the FDA and is a recyclable material. If your sandfall includes resin material this has been used for decorations in the aquarium trade for decades and is safe for aquarium use.